
Views: 0 Author: Site Editor Publish Time: 2025-07-31 Origin: Site
Are you looking for more privacy and style in your space? Privacy window film can offer a simple solution. It not only provides privacy but also diffuses light and protects from harmful UV rays.
In this guide, we'll cover everything you need to know about applying privacy window film. From installation tips to understanding its benefits, learn more about different types of window films in our detailed guide.

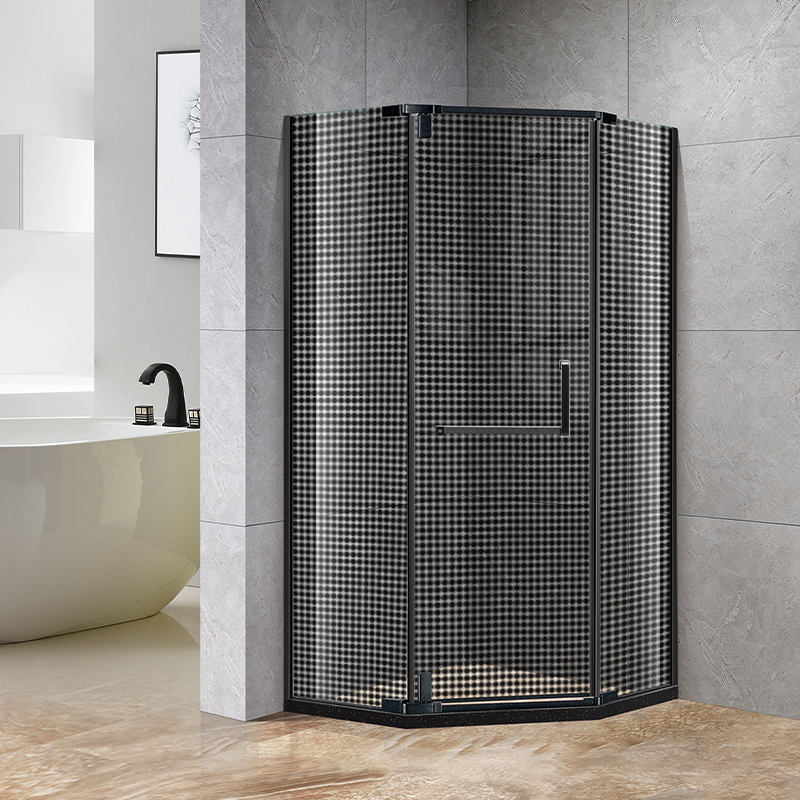
Privacy window film is a simple solution that enhances the privacy of your space while still allowing natural light to enter. It is typically made of polyester or PVC, and can be applied to any smooth glass surface. This film is designed to obscure the view from the outside while still providing visibility from the inside. It’s perfect for bathrooms, offices, or homes where you want privacy without sacrificing natural light.
There are various types of privacy window films, each with its own benefits:
Frosted Films
These films offer a frosted glass effect, providing maximum privacy. They diffuse light, creating a soft, even glow in the room.
Mirrored Films
Mirrored films reflect the outside, offering excellent daytime privacy. They work well for windows facing the street or any public space.
Gradient Films
These films gradually transition from opaque to clear, allowing more light while maintaining privacy in areas where it’s needed most.
Prismatic Films
Prismatic films have a textured finish that refracts light, creating beautiful rainbows inside the room while still keeping the outside view obscured.
Privacy window film is designed to do much more than just block the view. Here are its key features:
Privacy
It prevents prying eyes from seeing into your home or office, while still allowing light to enter.
Light Diffusion
The films scatter light, reducing glare and creating a more comfortable atmosphere inside the room.
UV Protection
Many privacy films also block harmful UV rays, which can fade your furniture and flooring over time. This added benefit helps preserve your interiors.
There are several types of privacy window films available, each offering unique benefits. Whether you're looking to enhance privacy, reduce glare, or add a decorative touch, there's a film type that fits your needs.
Benefits:
Frosted window films are perfect for maximum privacy. They diffuse light evenly, creating a soft glow while obscuring the view. These films add an elegant, frosted glass look to any window.
Ideal Areas for Installation:
They are commonly installed in bathrooms, bedrooms, and offices, providing privacy in spaces where people need to feel secure but still want natural light.
Bonus Insight:
Frosted films also help in reducing glare from direct sunlight. This makes them a great option for spaces that get a lot of sunlight, as they allow light to enter without overwhelming the space.
Benefits:
Mirrored window films offer excellent privacy during the day. The reflective surface makes it difficult for people outside to see inside. They work well for both residential and commercial buildings.
Drawbacks:
At night, when the inside lights are on and the outside is dark, the mirrored effect fades. This can compromise privacy, so it’s best to use curtains or blinds at night.
Best For:
Living rooms, offices, and exterior-facing windows, where daytime privacy is a priority.
Bonus Insight:
These films provide UV protection, which helps to block harmful rays that could cause fabrics and furniture to fade. This makes them a practical, long-lasting option for sun-exposed windows.
Benefits:
Decorative patterned window films offer both privacy and a decorative touch. They come in various patterns, from floral to geometric, adding style to your space.
Types of Designs Available:
Popular designs include floral, geometric, vintage-inspired, and more. The variety allows you to match your window film to your interior decor.
Bonus Insight:
These films are versatile and can be customized to match different decor styles. They can elevate the aesthetic appeal of both home and office spaces, making them a great choice for those looking to add flair to their windows.
Benefits:
Static-cling films are easy to apply and remove without leaving adhesive residue. They are perfect for temporary installations and can be repositioned as needed.
Best For:
Renters or anyone who frequently changes window treatments will find these films ideal. They’re also great for seasonal decor changes.
Bonus Insight:
Static-cling films are a fantastic solution for those who want to experiment with different styles throughout the year. They provide flexibility without the hassle of permanent installation.
Privacy window film offers a variety of benefits, from enhancing security to improving energy efficiency. Here's why it might be the perfect addition to your windows.
How Privacy Window Film Provides a Shield
Privacy window film acts as a protective shield, blocking outsiders from seeing into your space while still allowing light to filter through. It provides an extra layer of security without darkening the room.
Ideal for:
Bathrooms, bedrooms, and offices where you want privacy but don’t want to sacrifice natural light.
Protection from Harmful UV Rays
One of the major benefits of privacy window film is its ability to block harmful UV rays. These rays can fade furniture, flooring, and other interior elements over time.
Bonus Insight:
With UV protection, your belongings stay vibrant longer, and your space stays cooler, especially in rooms exposed to direct sunlight.
Modern or Classic Look
Depending on the type of film used, privacy window film can significantly enhance the appearance of your windows. Whether you choose frosted, mirrored, or patterned film, it adds a sleek, contemporary look.
Bonus Insight:
Privacy films, especially those with decorative patterns or stained glass designs, can transform plain windows into beautiful focal points, enhancing the overall decor of any room.
Reduce Heat Gain and Save Energy
Some privacy films are designed to reduce heat gain from the sun. This helps keep your space cooler during the summer months, leading to potential energy savings.
Bonus Insight:
Mirrored films can also reflect solar radiation, helping maintain a comfortable indoor temperature. This can lower your cooling costs and keep your space more energy-efficient.
Applying privacy window film is a straightforward process, but having the right tools and materials is essential for a smooth installation. Here's what you'll need:
Privacy Window Film
The main material, available in different types like frosted, mirrored, or decorative patterned.
Measuring Tape
To ensure accurate measurements for cutting the film to the right size.
Squeegee
For smoothing out air bubbles during installation.
Spray Bottle (with Soapy Water)
Helps wet the surface for easier application and repositioning of the film.
Utility Knife
Used to trim excess film after application.
Cleaning Supplies
Microfiber cloth, glass cleaner, and other tools to ensure the surface is dust- and grease-free before applying the film.
Scissors or Cutting Tool
Essential for cutting the film to the correct size before application.
Ruler
Helps in making precise measurements for a neat fit.
Microfiber Cloth
For cleaning the glass surface to avoid dust or debris that could affect the film’s adhesion.
If you're using a self-adhesive privacy window film, it's crucial to have a smooth, clean surface. Any dust or grease can cause air bubbles or wrinkles during installation, so take the time to clean the glass thoroughly. A clean surface will ensure a more professional-looking result.
Before applying privacy window film, it’s crucial to prepare the window surface. A clean and properly measured window ensures a smooth application and better adhesion.
Step-by-Step Guide for Cleaning
To ensure the privacy window film adheres properly, you need to clean the glass thoroughly. Follow these steps:
Gather Your Cleaning Supplies
Use a microfiber cloth, glass cleaner, or a mild cleaning solution.
Wipe the Surface
Gently wipe the glass to remove dust, dirt, and fingerprints. Pay special attention to the edges where debris often collects.
Rinse and Dry
After cleaning, rinse the surface with water to remove any remaining cleaner and dry it using a clean cloth.
Check for Residue
Make sure there is no grease or residue left, as it will affect the film’s adhesion.
Bonus Insight:
Avoid using harsh chemicals like ammonia or bleach, as they can damage the film or affect its adhesive properties.
How to Measure Windows Properly
Measuring your window is essential to ensure the privacy window film fits perfectly. Follow these simple steps:
Measure the Height and Width
Use a measuring tape to measure both the height and width of the window. Write down the exact dimensions.
Account for Overlap
Add an extra 1-2 inches to each measurement to ensure the film fully covers the window edges.
Cut the Film to Size
Based on the measurements, cut the film carefully using scissors or a utility knife.
Bonus Insight:
Always measure twice before cutting the film. This ensures you avoid any mistakes and get the perfect fit, which prevents the need for adjustments later.
Applying privacy window film is an easy DIY project when you have the right steps in mind. Follow this guide to ensure a perfect application and long-lasting results.
Before applying the film, cleaning the glass is crucial. A dirty window will result in poor adhesion and air bubbles.
Remove Dust and Dirt
Use a microfiber cloth and a mild cleaning solution to wipe the window, ensuring it’s free of any debris or grease.
Rinse and Dry
After cleaning, rinse the window with water to remove cleaning residues and dry it completely using a clean, dry cloth.
Bonus Insight:
Make sure the window is completely dry before applying the film. Water marks can form under the film if the glass isn’t dry enough, affecting the final result.
Measuring your window properly is key to cutting the film to the right size.
Measure the Window
Use a measuring tape to accurately measure the height and width of the window.
Cut the Film
Based on the measurements, cut the privacy window film, leaving an extra inch around the edges to allow for adjustments.
Before applying the film, you need to remove the backing paper and wet the window surface for easier positioning.
Peel the Backing Paper
Slowly peel the backing paper off the film, making sure not to touch the adhesive side.
Wet the Window
Use a spray bottle filled with soapy water to generously mist the window. This helps position the film and prevent it from sticking prematurely.
Bonus Insight:
Ensure you spray an even amount of water to avoid excessive moisture from seeping behind the film. This will prevent the film from sticking incorrectly.
Now, carefully apply the film to the wet window surface.
Position the Film
Gently place the film on the window, aligning it properly to ensure even coverage.
Press It Firmly
Press the film gently onto the window, starting from one side to avoid wrinkles or bubbles.
Air bubbles can be a common issue. Here’s how to get rid of them:
Use a Squeegee
Take a squeegee or plastic card and begin pushing the air bubbles out. Start at the center and work your way towards the edges.
Reposition if Needed
If the film isn’t aligned perfectly, you can lift it and adjust it gently.
Bonus Insight:
Always start from the center of the film and push the bubbles to the edges. This method helps achieve a smooth, even surface.
After applying the film, trim any excess material for a clean, finished look.
Use a Utility Knife
With a utility knife, carefully trim the excess film around the edges of the window frame.
Clean the Edges
Smooth out the edges to ensure no film is lifting.
Bonus Insight:
Leave a small gap between the film and the window frame. This prevents peeling over time and allows the film to stay secure.
Allow the film to dry and settle for a few hours. This gives it time to adhere properly to the window.
Drying Time
Let the film rest for at least 24-48 hours to ensure it adheres fully.
Avoid Touching
Don’t touch or adjust the film during this period to prevent any interference with the adhesion process.
Applying privacy window film can be a straightforward process, but there are common mistakes to watch out for. By avoiding these, you'll get a smoother, more professional result.
How to Avoid Cutting the Film Too Short or Too Large
One of the most common issues is cutting the film to the wrong size. Here’s how to avoid it:
Measure Twice, Cut Once
Always double-check your measurements before cutting the film. Use a measuring tape to get precise height and width measurements of the window.
Leave Extra Film
When cutting, leave a small margin (about an inch) to ensure you cover the entire window.
Use Sharp Scissors or a Utility Knife
A sharp tool makes clean cuts, preventing jagged edges.
Tips on Avoiding or Fixing Air Bubbles or Wrinkles
Air bubbles and wrinkles can ruin the appearance of your window film. Here's how to prevent and fix them:
Spray Water Evenly
When applying the film, use a spray bottle to coat the window and the film. This makes positioning easier and prevents bubbles.
Smooth Out Air Bubbles Immediately
Use a squeegee or plastic card to push air bubbles out as you apply the film, working from the center to the edges.
Fix Wrinkles by Re-positioning
If you spot wrinkles, carefully lift the film, spray water on the surface again, and re-align it.
How Dirty Windows Affect the Installation Process
A clean window is crucial for a successful application. Dirt, grease, or dust can affect how well the film sticks, causing peeling or air bubbles.
Clean Thoroughly
Clean the window with a glass cleaner or mild soap solution, ensuring it is completely free of contaminants.
Dry Completely
After cleaning, make sure the window is completely dry before applying the film.
Bonus Insight:
If air bubbles persist after application, you can gently puncture them with a pin. Then, smooth them out with a squeegee for a perfect finish.

To ensure your privacy window film stays in top condition, it's important to follow proper care and maintenance steps. Here’s how to keep it looking great for years.
How to Clean Privacy Window Film Without Damaging It
Cleaning your privacy window film correctly is essential to prevent damage. Here's how to clean it safely:
Use Non-Abrasive Cloths
Always use a microfiber cloth or a soft, non-abrasive towel to clean the film. Avoid rough materials that could scratch the surface.
Mild Cleaners Only
Opt for mild, non-ammonia-based cleaners. Harsh chemicals can damage the film’s surface or adhesive.
Gentle Cleaning Motion
When cleaning, wipe gently in a circular motion to avoid pressing dirt deeper into the film.
Best Practices for Preventing Scratches on the Film Surface
Keeping the surface of your privacy window film scratch-free is key to maintaining its appearance. Follow these tips:
Avoid Using Sharp Objects
Don’t use sharp or hard objects near the film. Even pens or nails can cause scratches.
Be Gentle During Cleaning
When cleaning, don’t press too hard. Gently wipe away dust or dirt to avoid scratching.
Keep Furniture Away
Avoid placing furniture or objects that may rub against the film, causing abrasions.
What to Do if the Edges Start to Lift or the Film Begins to Peel Over Time
If your privacy window film starts to lift or peel, don’t worry. Here’s what you can do:
Reposition the Film
If you notice the edges lifting, carefully lift the film and reposition it. Re-wet the window and the film before reapplying.
Use Adhesive Repair
For small peeling areas, apply a small amount of adhesive to the film’s edges and press them back down.
Prevent Future Lifting
To prevent peeling, avoid cleaning the edges too aggressively. Handle the film gently when cleaning near the edges.
By following these care steps, you can ensure that your privacy window film remains in good shape and continues to provide privacy, light diffusion, and UV protection for a long time.
A: Yes, privacy window film can be removed without damaging the glass. For adhesive-backed films, carefully peel the film off, starting from the edges. If it's static-cling film, simply lift and reposition it. Use a hairdryer for extra heat to ease the removal process if necessary.
A: The lifespan of privacy window film varies depending on the type and quality. High-quality films can last up to 10 years or more, while cheaper films may show signs of wear, such as fading or peeling, within 3-5 years.
A: Privacy window film can be applied to most windows, including curved or frosted glass. However, certain types of films are designed specifically for non-flat or uniquely-shaped windows. Always check the manufacturer’s guidelines for compatibility.
Privacy window films offer a cost-effective, easy-to-install solution for privacy, aesthetics, and energy efficiency. They enhance your space by providing privacy while still allowing natural light.
Follow the outlined steps carefully for the best results. Remember to maintain your film properly to ensure it lasts and continues to perform well over time.


